
How to Control Which Dropdown Options Are Available in monday.com
Your monday.com board has a dropdown column. Project phases, priority levels, department assignments, whatever. The problem: everyone sees every option, all the time. Nothing stops someone from jumping straight to "Completed" or picking "Executive" priority on a routine task.
monday.com doesn't have native conditional dropdowns. The conditional status column exists, but it only works for status columns. Dropdowns get nothing. And even conditional status can't enforce sequences, restrict by user, or require fields to be filled first.
Column Changes Guard works on dropdown columns. You define which options are available, when, and for whom.
How does it work?
You define which dropdown values are allowed and under what conditions. Each value can have its own set of rules: who can select it, what other fields need to be filled, what another column's value must be.
For example, a department assignment dropdown might have rules like:
- "Engineering" is only available if a technical description is filled
- "Legal" can only be selected by managers
- "Finance" requires a budget amount to be set
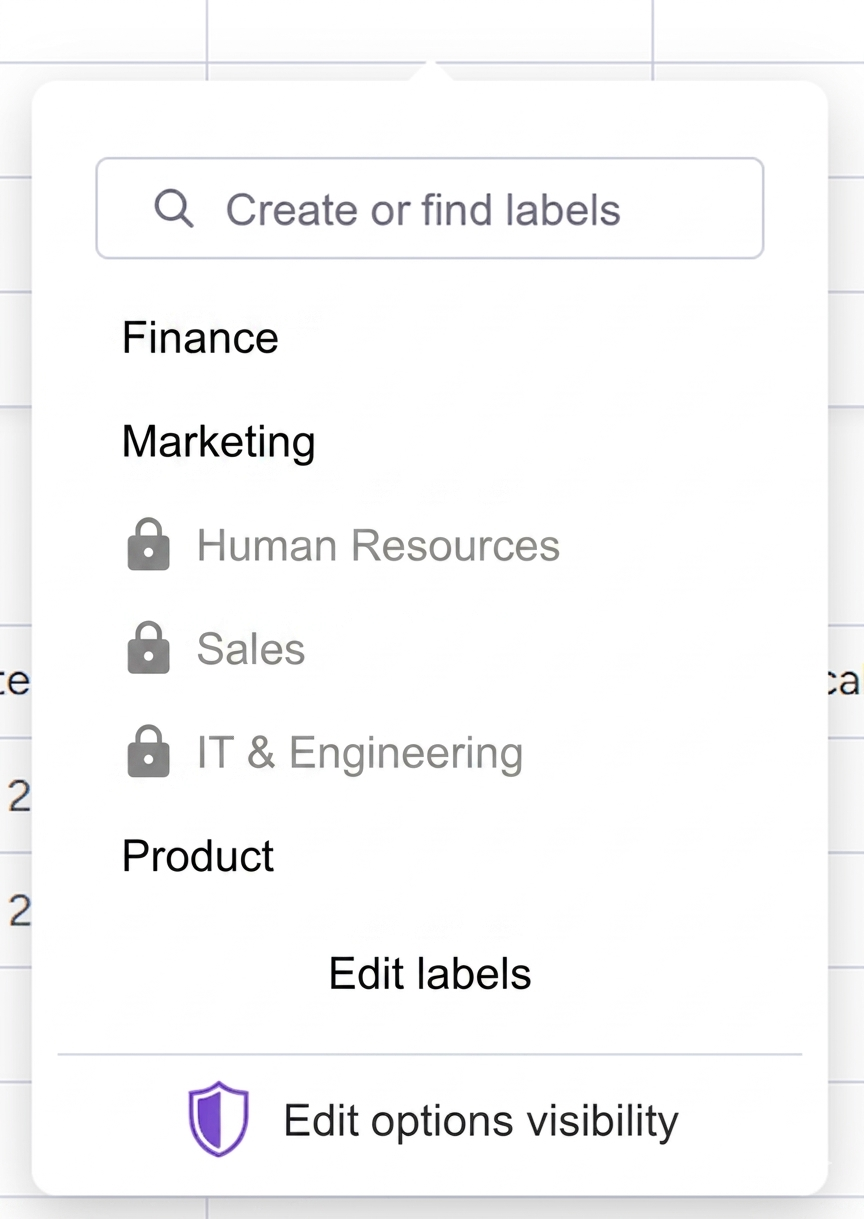
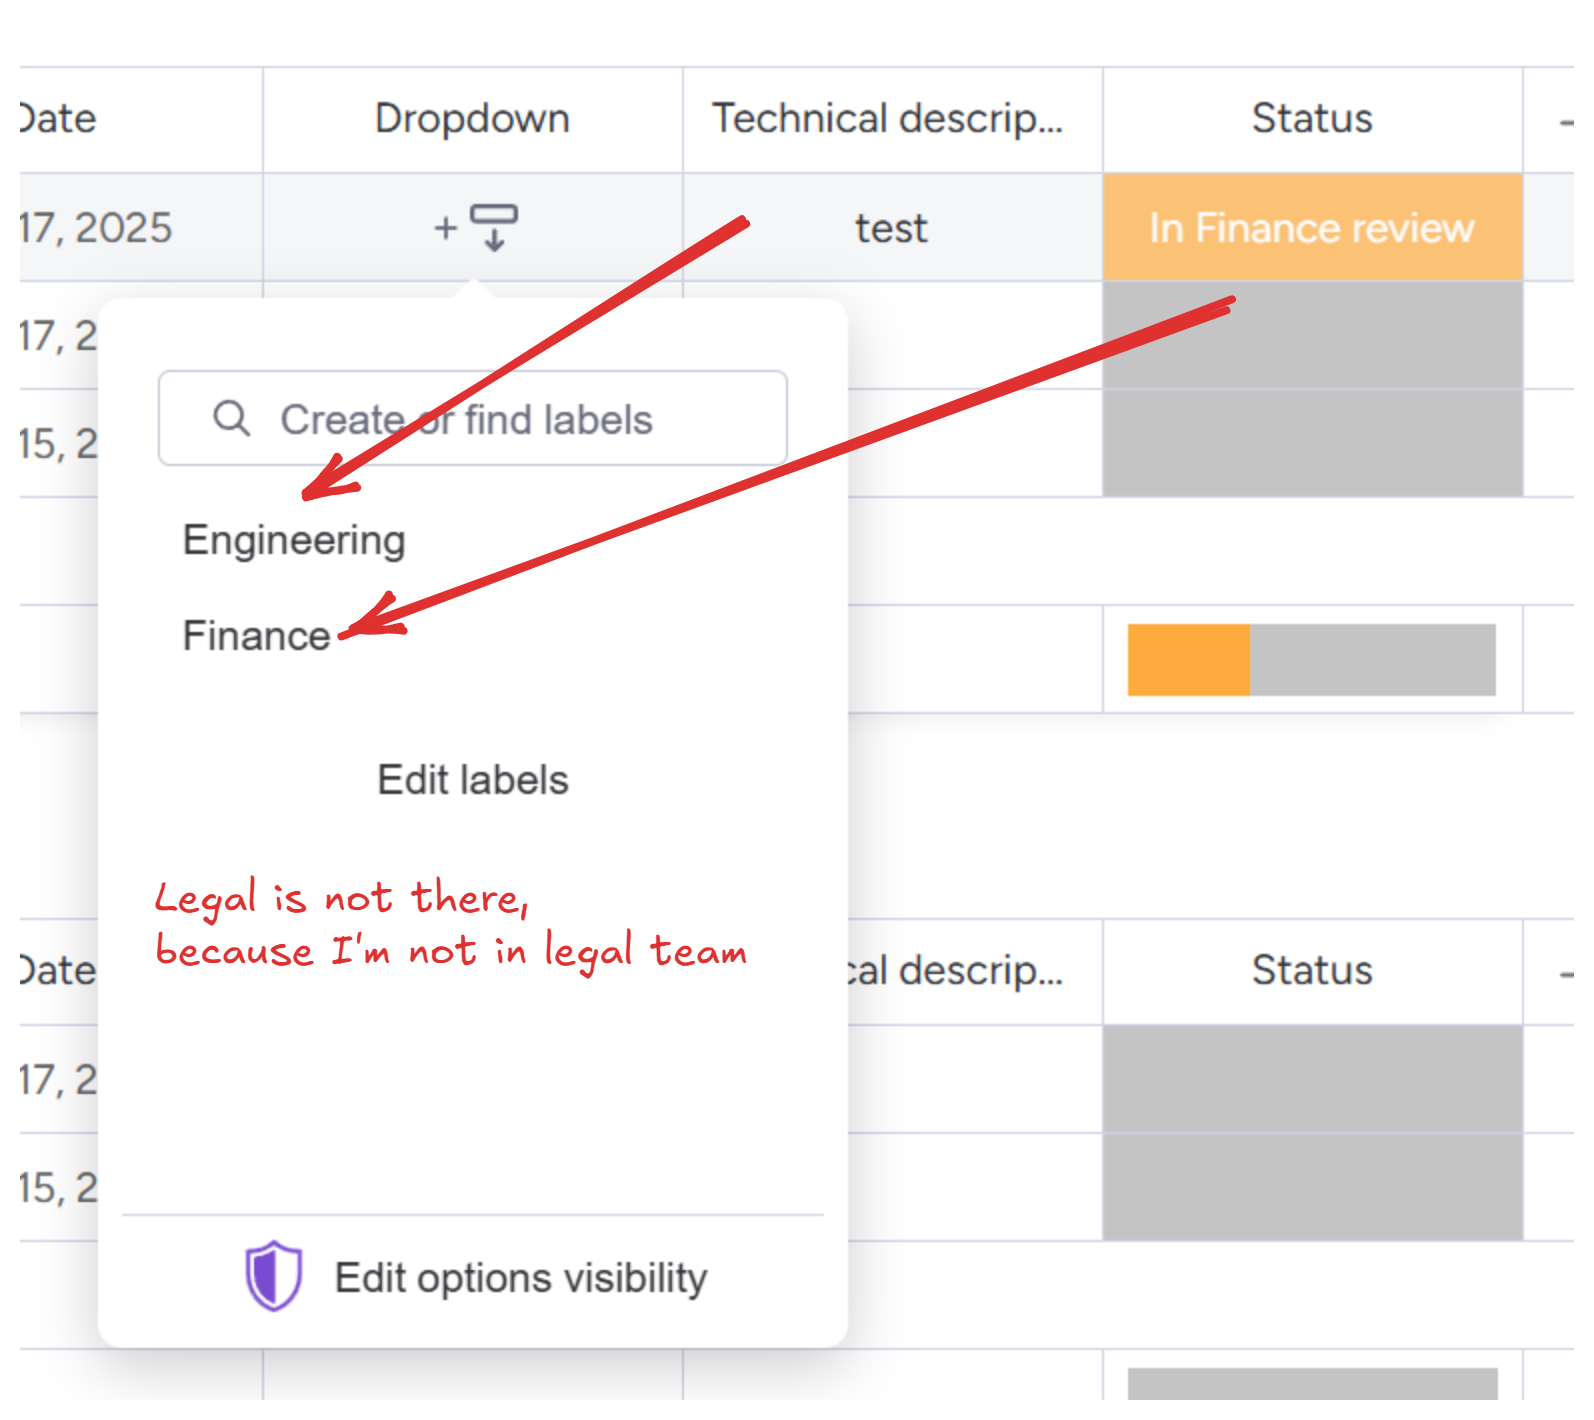
When someone opens the dropdown, they only see the options they're actually allowed to pick. No confusion, no rejected changes.
It works on status columns as well! We cover this in more details in status column restrictions.
Step 1: Install Column Changes Guard
Open the monday.com marketplace and install Column Changes Guard. Select your workspace and confirm.

Step 2: Add a Column Changes Guard dropdown
Click the "+" button to add a new column. In the column center, find "Installed Apps" section and select "Dropdown".
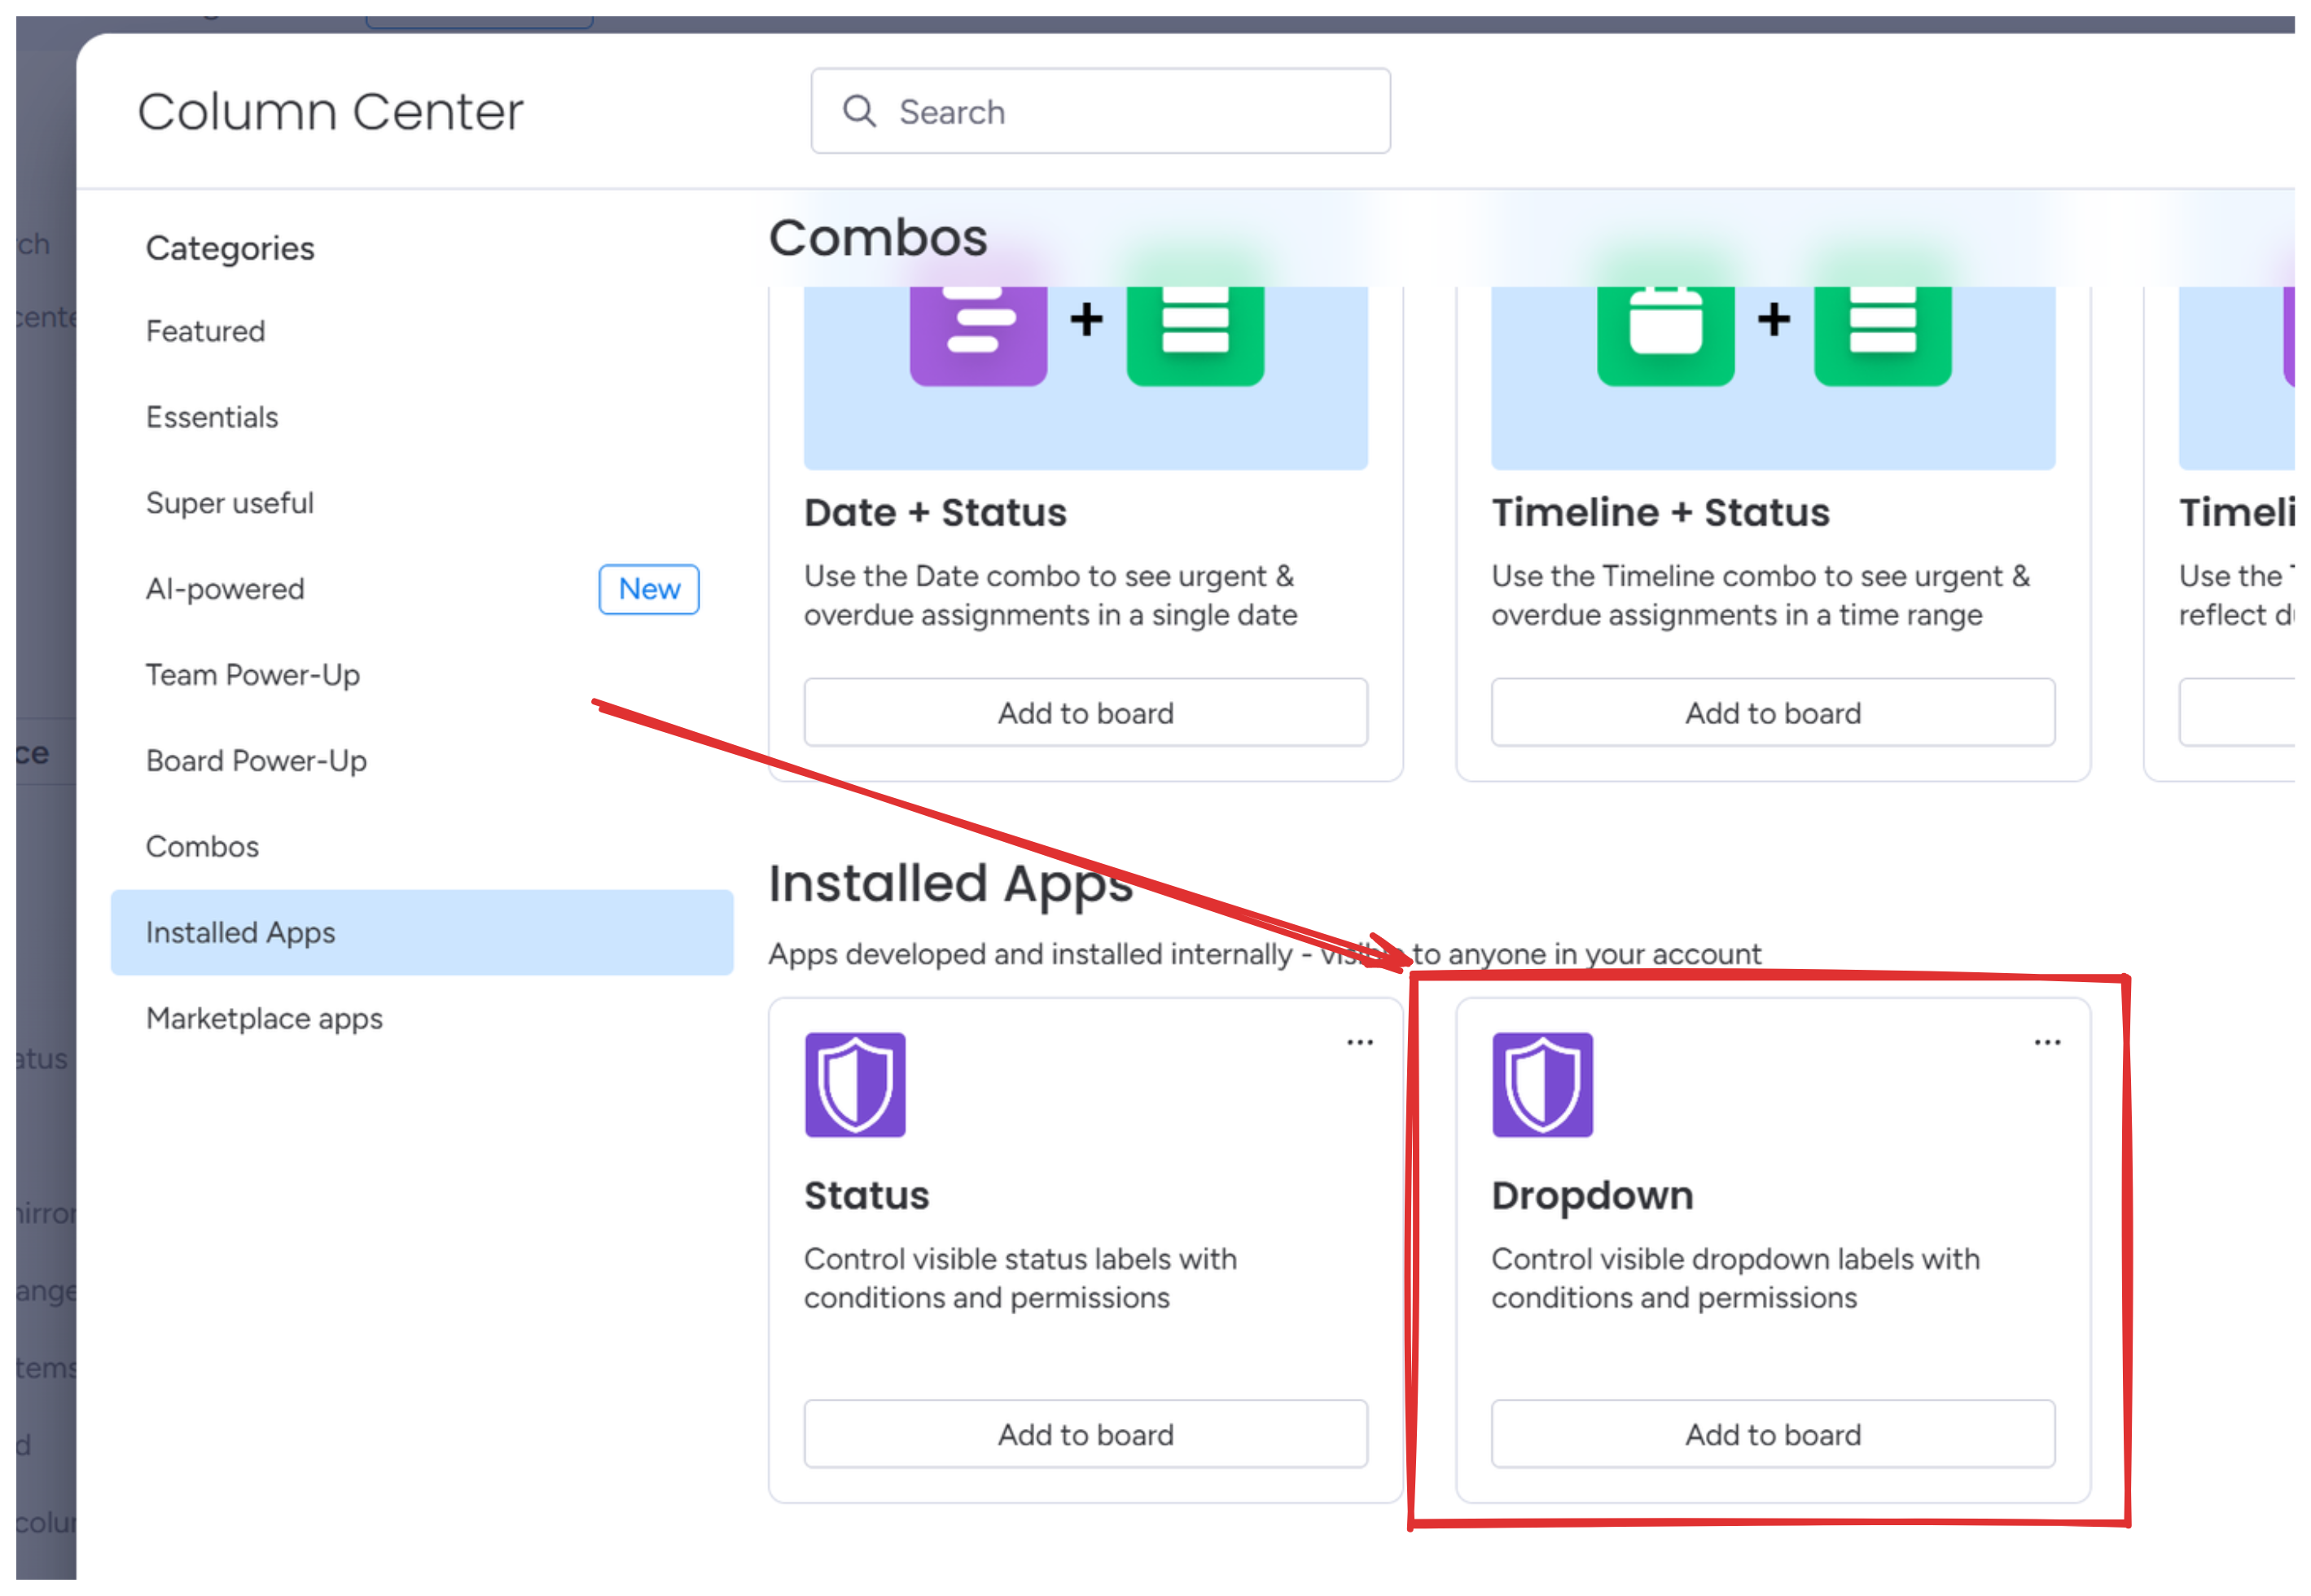
The column appears on your board. Click on any cell to open the configuration panel.
Step 3: Define your dropdown values
Add the values you want in your dropdown. For a department routing dropdown: Engineering, Legal, Finance.
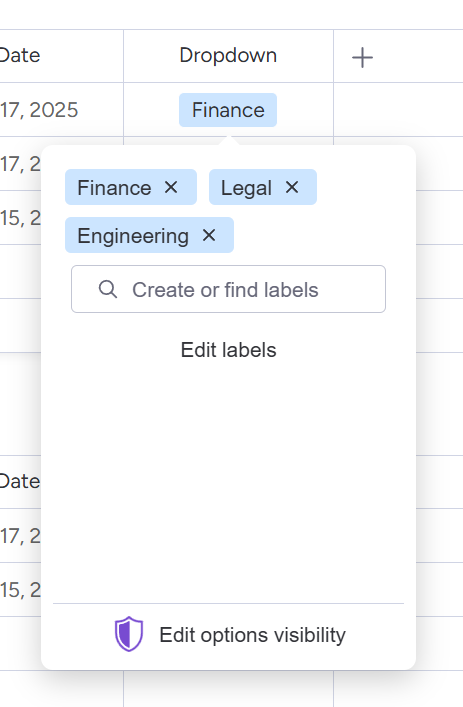
Each value can have conditions attached. Values without conditions are available to everyone.
Step 4: Add conditions to values
Click on a value to add conditions. Conditions control when that option appears in the dropdown.
Conditions can check People columns, Status columns, Text fields, Date columns, Numbers, other Dropdowns, or Connected boards.
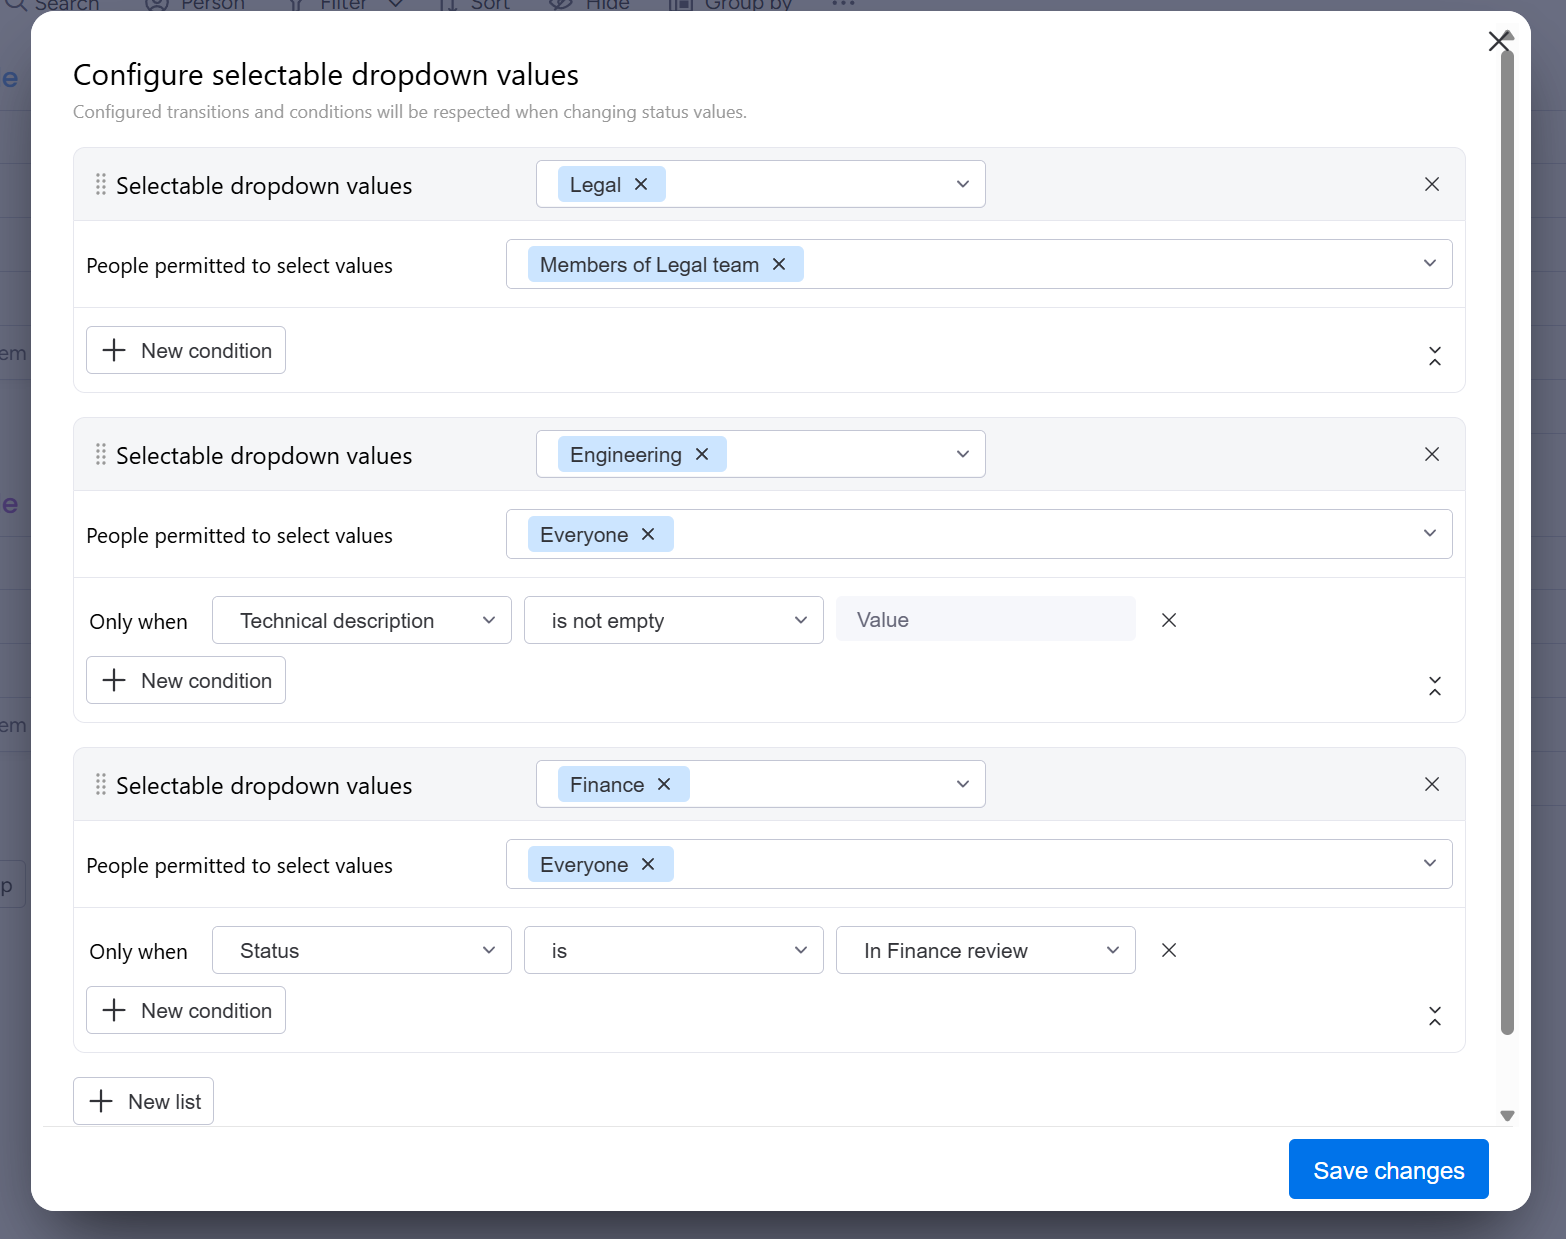
Some examples: "Engineering" requires a technical description. "Legal" requires the person selecting it to be in Legal Team. "Finance" requires Status to be "In Finance review".
Step 5: Test your configuration
Save the configuration and try selecting values on your board.
- Open the dropdown - you should only see values you're allowed to pick
- Check a conditional value - it should be hidden until the condition is met
- Meet the condition and open the dropdown again - the value should appear

Real examples
Department routing: Engineering, Legal, Finance. "Engineering" requires a technical description. "Legal" requires a contract reference. "Finance" only appears for users in Finance Team.
Service tier: Basic, Professional, Enterprise. Anyone can select Basic or Professional. Enterprise only appears when Account Type is "Corporate".
Region assignment: North, South, East, West, International. "International" requires a shipping address to be filled. Regional options depend on the warehouse location.
Request type: Bug Report, Feature Request, Security Issue. "Security Issue" only appears for internal team members. External users see Bug Report and Feature Request.
Setup summary
- Install Column Changes Guard from the marketplace
- Add a Column Changes Guard dropdown from the column center
- Define your dropdown values
- Add conditions to values that need restrictions (user permissions, required fields)
- Test by opening the dropdown and checking which values appear
Learn more
- Column Changes Guard documentation - full setup guide
- Control status columns - same concept for status columns
Questions? Email [email protected]. We usually reply within a few hours.